
While Apple’s “it just works” mantra simplifies the Mac experience, discerning listeners know audiophile-quality sound requires added tweaking and customization.
Out of the box, Macs fail to unlock the full dynamic range and spatial imaging demanded by high-fidelity playback through premium headphones and speakers.
However, through systematic fine-tuning across both software and hardware layers, the same MacBook can be elevated to render studio-master-grade audio. This article covers key steps for extension enthusiasts and vinyl rippers seeking goosebump-inducing musical clarity flowing from a tuned-up Mac.
Use Lossless Audio Formats
When choosing audio formats, it’s important to understand the difference between lossless and lossy compression. Lossless formats like FLAC, ALAC, WAV, and AIFF use a form of compression that preserves 100% of the original audio quality. They compress the files in a way that can be reversed to perfectly recreate the original uncompressed data.
This allows you to keep all the fidelity and dynamics from the master recording while taking up less storage space. Meanwhile, lossy formats like MP3 and AAC throw away some audio data irreversibly in order to achieve much smaller file sizes. At low bitrates, this can introduce audible compression artifacts and dull the sound. For critical listening, audiophiles always want lossless formats because the higher bitrates retain the full nuance, detail, and liveliness of the original performance.
You lose none of the subtle textures and musical information encoded by the artists and engineers. Lossy formats can still sound decent at higher bitrates, but inherently cap the achievable quality compared to lossless. For the optimal listening experience with uncompressed audio sources, take the time to use lossless formats whenever possible.
Customize Mac Audio Output
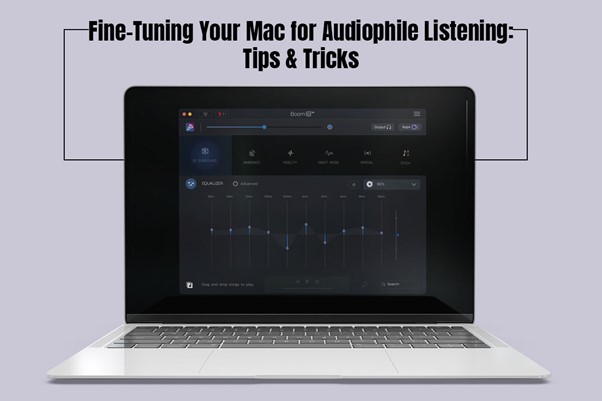
By exploring the advanced sound settings on your Mac, you can make audio output conform to your taste and have the quality of your listening experience improved. For example, you can use one of the equalizer presets or customize equalizer.
Additionally, you can tune the bass and frequency response based on the characteristics of your speakers or headphones in order to achieve a balanced and accurate sound reproduction.
Moreover, to take full advantage of high-resolution lossless audio formats, you need to make sure your playback devices are configured to support hi-res output. In your Mac’s System Preferences under Sound, go to the Output tab and look for the option to set the sample rate and bit depth.
For optimal fidelity, you’ll want to select the maximum values supported by your DAC, amplifier, speakers or headphones – typically 96kHz/24-bit for entry level equipment and up to 192kHz/32-bit for high-end gear. This matches the output resolution to the capabilities of your downstream components, ensuring you can actually hear all the enhanced detail in the original hi-res recordings.
Besides, altering the buffer size could increase sound quality and lower latency, thus causing a smoother playback and a better clarity.
Get a Good External DAC
While the built-in DAC (digital-to-analog converter) in your Mac can perform adequately, it was not designed to the stringent standards of audiophile-grade DACs. Dedicated external DAC units from high-end audio companies boast superior components, architecture, and tuning that demonstrably measure better across key audio performance metrics like distortion, noise, channel separation, and dynamic range.
This enables more pristine, accurate conversion of your digital audio source files into analog signals fed to your speakers or headphones. External DACs also provide clean, isolated power as well as precision clock timing that greatly reduces jitter, enhancing clarity.
There are excellent audiophile DAC options from companies like Chord and Schiit that connect via USB or Thunderbolt interfaces, supporting hi-res PCM up to 32-bit/384kHz as well as native DSD.
Upgrade Your Cables
While digital audio transmission seems intangible, analog cables still play an important role in maintaining signal quality between your components. Upgrading to thicker audiophile-grade cabling with high-purity copper or silver conductors, advanced shielding and insulation helps minimize interference and loss over long runs.
Brands like Audioquest make cables tailored to provide minimal loss and coloration across the entire audible spectrum.
Use a Music Player with Advanced Features
While the built-in Music app or iTunes may be fine for casual listening, audiophiles require more advanced software with customizable audio processing and direct integration with external DACs.
Programs like Audirvana, Roon, and JRiver are designed specifically for bit-perfect playback of lossless hi-res formats with extensive configuration options.
Besides handling file management and library organization, they allow you to fine-tune sample rate conversion, memory caching for smooth playback, digital filters, EQ, and output modes. Some offer automatic switching between DSD and PCM as well as DSP functions like room correction.
Get Quality Speakers or Headphones
At the end of the signal chain, the speakers or headphones are tasked with actually conveying the nuance and dynamics from high-resolution lossless audio. Maximizing fidelity requires premium transducers engineered with tight tolerance components and meticulous tuning.
Audiophile-grade speakers and headphones offer ultra-low distortion drivers, advanced diaphragm materials, optimized enclosures, and multi-way crossovers essential for articulating every subtle detail at a wide frequency range and high volumes without strain or coloration.
Models from reputable high-end brands matched to your listening preferences will enable perceiving the layers of musical information and spatial cues encoded in the recordings. This allows you to fully experience recordings as intended by their creators. The electronics can only preserve and amplify what the transducers themselves are able to cleanly reproduce. Quality matters most at this final stage.
Control Your Listening Environment
Critical listening requires an optimal listening environment free of inside and outside disruptions. Position speakers away from room boundaries and control reflective surfaces via sound absorption panels. Acoustic treatments help tame excessive reverb and anomalous resonances so you hear actual source audio, not colored room effects. Close windows and doors to block outside noise and distractions and turn off home electronics and internal fans. Essentially, strive for a quiet, dimmed space with minimal visual stimulation and sonic interference between you and the speakers. This calm environment, combined with focused active listening, heightens aural acuity and the ability to discern fine sonic nuances. External noise competing with the music masks low-level detail. Controlling your space this way provides the ideal setting for in-depth audiophile listening sessions.
Conclusion
Fine-tuning your Mac for audiophile listening through various tips and tricks can elevate your music listening experience to new heights of clarity and fidelity. Whether you’re a casual listener or a dedicated audiophile, implementing these strategies will ensure that every note and nuance of your favorite music is faithfully reproduced, allowing you to immerse yourself fully in the sonic bliss of high-quality audio.